
Been at Maker Space a lot this weekend finishing off my light box. This project was the reason I built the solder fume extractor fan in my previous blog!
I have being doing some crafty type things over the summer holidays with the kids. We followed one of those ‘101 Things to stop your kids whingeing over the school holidays’ type books . You know what I mean. Anyway, the activity chosen involved tracing a pattern from the book. Which is all well and good apart from the fact you cannot see the outline when you put paper over it. We did manage to proceed using the hold book and paper up against a window trick, but what we really needed was a light box.
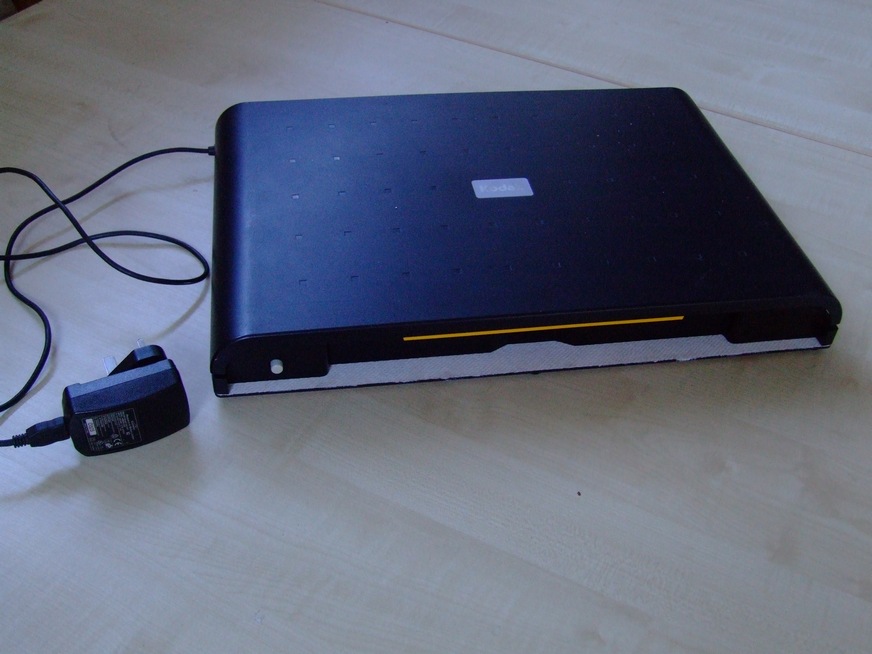
I happened to have a old Printer/Scanner which I had already broken down for parts. It is a Kodak ESP7 All-in-one printer and I thought the top half i.e the scanner bed and lid would be ideal to hack into a light box.
LED sandwich

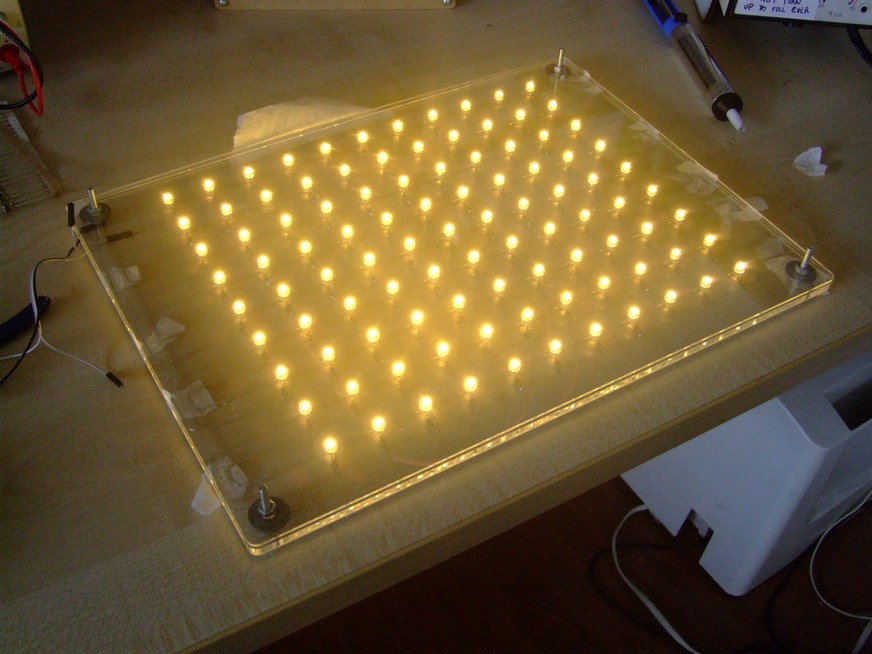
The light comes from 11 x 9 array of LEDs spaced 25mm apart. I decided to use a 5V USB charger as the power source so that meant I needed to solder all 99 LEDs in parallel each with its own 100R resistor. I should mention the type of LEDs I used. They we clear, white coloured wide angle LEDs. Search on the internet for ‘Straw Hat LED’.
The LEDs are sandwiched between two layers of clear acrylic. These were laser cut. The top layer is 3mm thick acrylic with 4mm holes to allow just the tops of the LEDS to slide in. The bottom layer is 6mm thick acrylic needed for rigidity with 3mm holes to allow the LED legs to pass through. The sandwich is held together with 4 nut and bolts. One in each corner. No glue was needed.
The Base
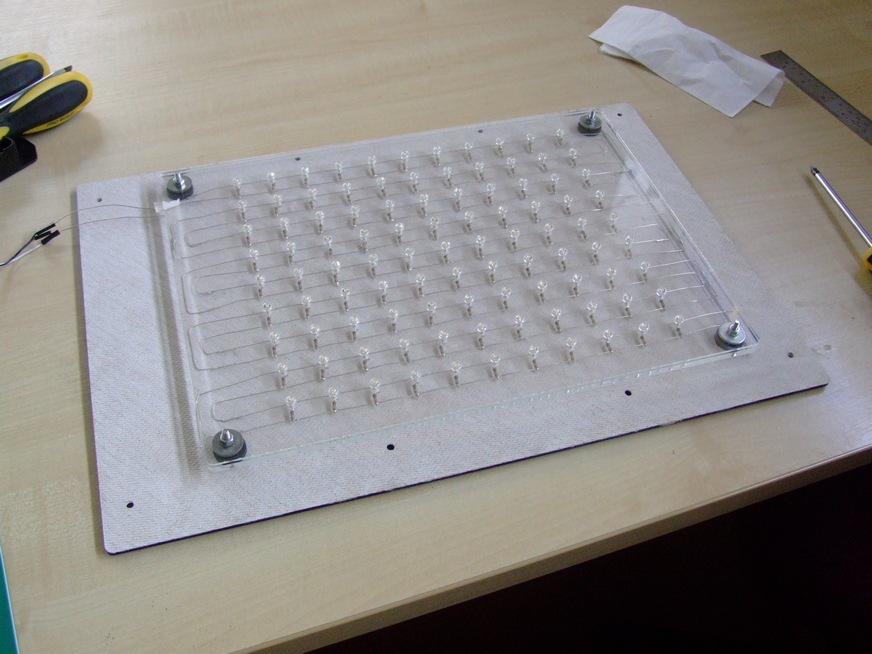
The base was also laser cut. This time out of 3mm hard board which I later painted white. There are holes which line up with the bolt holes in the acrylic sandwich. In fact, once the LEDs were soldered together, the bolts were undone and passed through the hardboard base holding all three layers together. The other holes you see line up with screw threads in the scanner bed.
The scanner bed


Now placing the scanner bed on top to check everything lines up. The light needed to be more diffused so I cut an extra bed out of 3mm thick translucent acrylic to place over the existing glass bed of the scanner. At this point, the LEDs were still being powered by the bench power supply so next stage was to add a USB cable and a power switch.
Add power

Although not powered up you can see the glass bed has been covered with a layer of translucent acrylic. Also I have wired in a USB charging cable and I have added a push button switch which you can just about make out on the bottom left. Its a round white coloured switch. The USB charger needed is the standard 5V but must be able to deliver a current of 1.5A.
Power Up
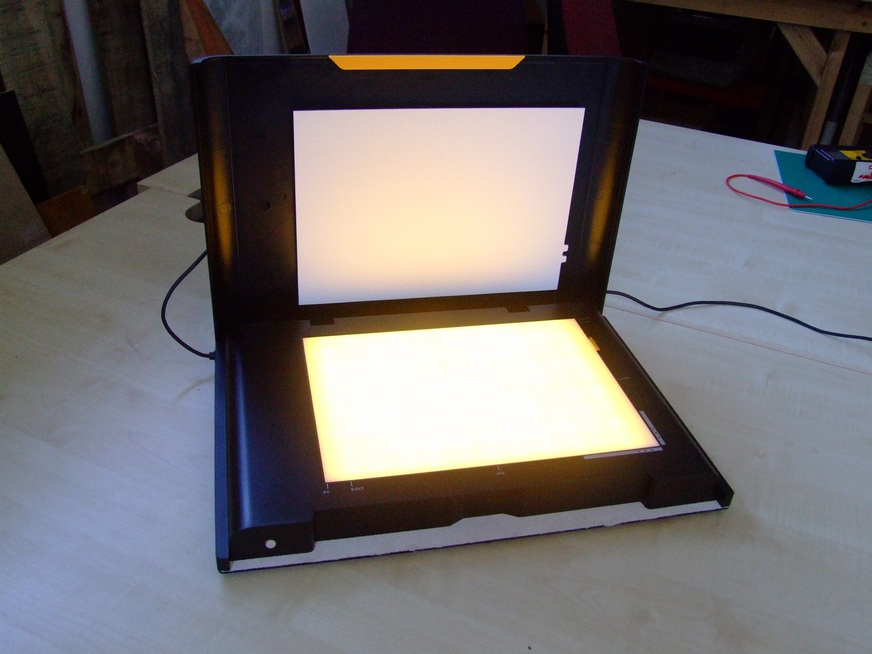
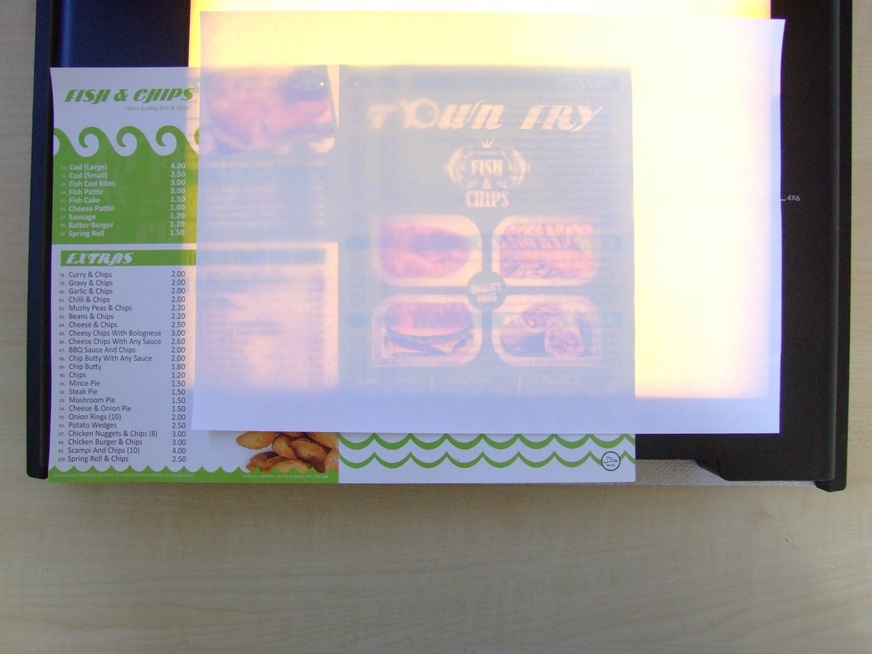
So here is the finished project all powered up and a test using Maker Spaces’ local chip shop menu. You can see the wide angle ‘Straw Hat’ LEDs gives a fairly even spread of light, though in real life you can just about make out individual point of lights. I reckon spacing the LEDs at 20mm or raising the bed slighter higher would merge the light perfectly, but for now, its good enough for me.
You might have guessed from my recent posts that I am a big fan of using the laser cutter. The laser cutter is for use by members only and as such, we do not have a laser cutter themed open evening. However if you want to find out a bit more about laser cutting before joining up, why not come along for a chat on one of our non-member opening evenings. These are every Wednesday from 6pm to 8pm.
– Tommy